Tuesday, February 14, 2017

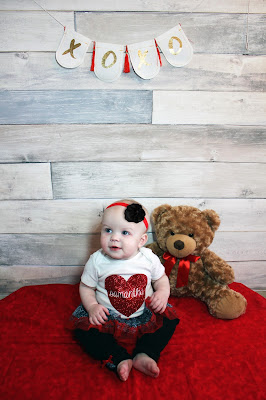
Samantha's 11 Month Update!


One more month. Just one more month until this baby girl is one year old! I can't believe how quickly this first year has flown by. 

Height/Weight: According to our home scale and measuring tape, Samantha is 19lbs 5oz (44%) and 27.5in (31%) long! She has not grown much at all this past month, but I remember this being about the time that Vincent slowed down as well, so I'm not concerned!

Daily: So lately, Samantha's daytime routine has been very sporadic. Because of teething and bad nights, her nap schedule during the day is completely out of whack and I haven't been pushing terribly hard to fix it, because we're all tired and the schedule doesn't seem to be helping much. We still get up at around 8AM, but some mornings, following really rough nights, we will get up closer to 8:30 or 9. I nurse her first thing as always, then get her changed and dressed before getting Vincent up (he is always already awake at this point, playing in his bed with this stuffed animals) and getting him dressed for the day. Breakfast is anywhere between 8:30 and 9:30, then we have playtime until Samantha is ready for her first nap. Right now, it's been between 11 and 12. I've really been trying just to read her cues and go with the flow, to take a break from the strict schedule, but I kind of feel like I'm damned if I do, damned if I don't. :/ 
Samantha still very much enjoys playing with cars and trucks, the play kitchen, her little people house and this American Idol McDonald's toy that plays music! She pushes the button and dances. xD She's been taking a huge liking to stuffed animals and dolls lately and likes to snuggle them and hug them! :)


Sleep: I was so tempted just to leave the same text from the previous month, because absolutely nothing has changed. Sleep has been lacking big time and I am beyond certain that the majority of it is due to teething. Exactly the same as last month and the month prior, Samantha has been completely refusing a second nap, no matter how hard I've tried to push it. Sleep at night has been as bad as the previous month - I will either put her down successfully at around 8 and then she'll wake 20-30 minutes later, or I am unable to get her down at all and she will be up until around midnight or later. Sometimes she'll even wake up in the middle of the night and not go back to sleep until long after the sun has risen. It's been extremely challenging lately and Mike and I are very sleep deprived. But the fact that she's teething helps me to emotionally deal with it better, since I know that she's hurting and just having a hard time sleeping. The upside is that almost every day, she will take one long, solid 2-3 hour nap. On rare occasions she won't go down at all, but thankfully that isn't the norm!


Building blocks past midnight! One of the many activities we
do when she's refusing to sleep.

Eating: I could not be more happy that we're still breastfeeding and going strong! I wanted SO badly to breastfeed Vincent until he was at least a year old and it was hard when we had to stop. Teething has made it a little challenging lately, because she will gnaw sometimes, which is (as you can likely imagine) pretty painful! But it's not as bad as I expected it would be. She is now nursing every 3 hours or so during the day - I kind of go with the flow and feed on demand. She eats solids 2-3 times per day and is doing very well with that! Her favorite food EVER is mashed potatoes, especially with gravy!! I always feed it to her off my plate and have to get a second helping, because she eats about half of mine. Haha! She also really likes refried beans with cheese on Taco Tuesdays. For snacks, she loves puffs! I've offered her about every flavor combo they make and she loves them all. 


Sizes: Samantha is still in 12 month clothing and likely will be for a bit still! I've opened the front snaps on all of her cloth diapers this past month, but she is still in a size 4 disposable diaper when we use those occasionally.


Milestones and Changes:
  • Samantha has FOUR teeth now!! This past month, both of her top front teeth have popped through! It seems like she is working on some more bottom teeth right now, but it's super hard to check her due to her gum pain. It's crazy to think that at this exact age, Vincent got his first tooth and Samantha already has so many! 
  • She has started giving the biggest and most loving hugs!! She will grip onto you ever so tightly! Here she is giving brother a big hug:

  • She is walking assisted, holding onto my finger with one hand! I swear it won't be much longer before she is walking.

  • Samantha is a total and complete daredevil. The other day, she climbed over the back of Vincent's couch and went face first into the corner of a book. So she's got a huge red mark on her cheek right next to her eye. I swear if either of the kids is going to need to go to the emergency room, she will likely be the first! She is a LOT less cautious than Vincent was at this age and still is!

  • She has started saying MAMA! Oh my goodness it was like music to my ears the first time she said it!! :D I have been waiting for almost 6 months to hear her say it!!
  • Samantha picks up anything that resembles a phone and says "heyo?"! She just barely started doing it and it is the most precious thing ever!

Wednesday, January 25, 2017

Our Modern Cloth Diaper Journey


Quick disclaimer before I begin: this post may be a little bit TMI (don't worry, no revealing or nasty photos!), so if you get a bit squeamish over the talk of urine or feces, this post might not be for you! 

I know what you're thinking. Cloth diapers?! Seriously?! You're probably wondering why on earth I'd voluntarily handle, rinse and wash poopy diapers. Or why I'd spend so much money on the diapers to begin with. I had these same thoughts before I started! But surprisingly, cloth diapering is so much different than I expected it would be! And a LOT cheaper. First of all, let me tell you a little bit about modern cloth diapers.

I imagine, when you think of a cloth diaper, you picture something like this:


While many cloth diapering parents choose to use traditional cloth diapers with safety pins, there are a lot more simple and efficient options in modern cloth diapering. When we were visiting my grandparents just after we'd started, my grandmother was blown away by how cloth diapering has evolved since she had her babies in cloth! Allow me to introduce you to the types of cloth diapers we use:

Pocket Diaper
Pocket diapers are simple to use and very cost efficient. We use Alva brand, which is between $4 and $6 per diaper, depending on where you purchase. Since they are all one size, the same diaper can fit an infant as small as 6 lbs, up to a 33 lb toddler. How is this possible? Because these, as well as most other modern cloth diapers, have three different snap settings, allowing you to adjust the diaper to fit your baby the best. 
The diapers themselves, however, are not absorbent on their own. The reason they have a pocket, is to hold a diaper insert. I will talk about those later.


AIO (All-in-One diaper)
The all in one diaper is the easiest, as it requires no stuffing (in other words, adding an insert). The insert is sewn into the middle, so once you're done, you simply take it off and throw it into the laundry or wet bag (I'll get to dirty diaper storage later). The AIOs we have come with pockets, so you can add extra absorbency if needed. I personally am a huge fan of this type, because it allows me to add extra absorbency and create a nighttime diaper. Our AIOs also have double gussets on the legs (see below), which helps prevent leakage even further, which is very important for us, since Samantha is a heavy wetter. 


AI2 (All-in-two diaper)
An AI2 diaper is a good mix between a pocket and an AIO diaper. It comes with an insert that snaps into the pocket, which you can either stuff inside it or lay on top. Since it has that pocket, you can also add an extra insert. 

Cloth Diaper Prefolds & Flatfolds
Using prefolds or flatfolds is pretty much like traditional cloth diapering. They are rectangular in shape and come in various sizes. The prefolds have a thicker layer of absorbency in the middle and a thinner layer on the sides. The flatfolds are (as the name suggests) flat and have to be folded a bit differently. There are several different methods on how to put the diaper on, depending on your personal preference. Some folds work better for boys or girls or a light or heavy wetter. Closing the diaper, however, has become MUCH easier with a "Snappi", which I'll talk about later. Once you've got the diaper on, you put a cover over top.


Top view of a prefold


Diaper Cover
Covers look a lot like pocket diapers on the outside, because they have the same adjustable snaps on the front. This trumps the old fashioned plastic pants, because you can use the same diaper from the time your baby is born until he or she is out of diapers. You can purchase size specific covers, just as you can purchase size specific pockets, AIOs and AI2s, but this ends up being more costly in the long run. Our covers have those double gussets I love and are great at preventing leaks!


That covers all the diapers we own! Next, I'll show you what "extras" we have for our diapers. 

Diaper Inserts
Inserts come in three different materials:
  • Microfiber ($ - absorbs the quickest, but holds the least amount of liquid)
  • Bamboo ($$ - absorbs a little slower, but holds more than microfiber)
  • Hemp ($$$ - absorbs the slowest, but holds more than bamboo and is also the thinnest insert of the three)
Microfiber inserts are best used during the day, when you'll be changing often. They also pair very well with Bamboo or Hemp, if you're needing a little extra absorbency. Bamboo and Hemp are recommended for heavy wetters or night time, since they hold the most liquid and aren't as prone to causing leaks. Another great thing to use along with a diaper insert is a folded up flatfold inside the diaper for extra absorbency.


Snappis
A "Snappi" basically replaces safety pins. They are super quick and easy to use and allow you to make adjustments once you've put the diaper on, without having to unpin and repin. They also come in loads of different fun colors! When they're not in use, you can simply fold the strip at the end of each "leg" to the back of the Snappi, and slip over the teeth of the white grip. That way the sharp teeth aren't exposed.

Diaper Liners
Diaper liners make dealing with poop very easy. Depending on the consistency, you can either lift the liner out of the diaper and dump the poop into the toilet or rinse it and avoid stains on the diaper itself. They're also great to use when you need to use heavy duty diaper rash cream, which could stain or damage your diapers. You can either purchase convenient flushable liners, which you simply lift out of the diaper and throw into the toilet. These liners are eco-friendly, unscented and run about $10 for a roll of 300. Or you can use fleece liners, which you rinse off, just as you would rinse a diaper, wash and re-use. You can purchase these or do what I did, by purchasing a cheap fleece blanket from Walmart and cut it up to make liners. This only took me about half an hour and cost under $3. The thing I like about fleece liners, is that they're soft on baby's skin and are good at keeping moisture away from their bodies. So if your baby is sensitive to being in a wet diaper, fleece liners are the way to go!


Cloth Wipes
If you're wanting to go 100% cloth, you'll want to invest in or make your own cloth wipes. They come in lots of different materials and colors. I purchased 4 packs of 12 Gerber flannel cloth wipes for $1.50 apiece on clearance at Walmart, which is all we need. Some people like to store their wipes soaked in water or wipe solution in a wipe dispenser, or wet them with water or spray them with solution individually as they use them. Spraying individually is likely the route we've gone, since storing them wet can sometimes result in mold or mildew. We personally don't use them except for when changing pee diapers, because they're just one more thing to have to rinse off after changing a poopy diaper. 

Wet Bags
Wet bags are used to store your cloth diapers. They are made of heavy duty waterproof material, which keeps the smell out and the moisture in. They come in lots of different prints and sizes, depending on your needs or preference. That way, you can have a larger one for at home and a smaller one for the diaper bag. Lots of folks prefer to use hampers or even a traditional diaper pail with a diaper pail liner. These liners are made of the same material as the wet bags. We've only used a wet bag so far, but have considered switching to a hamper for at home use, as the wet bag doesn't allow the diapers to breathe like they would in a hamper. So opening the bag after 1-2 days can smell pretty strong! :P

Diaper Sprayer & Spray Shield
A diaper sprayer is an absolute must if you're cloth diapering. Basically it works like a bidet. You simply install it in between the hose that's coming from the wall and where it connects to the tank, with the T valve that the sprayer comes with. It has a lever on the valve, which allows you to turn it on or off and adjust the pressure of the sprayer. When you've got a poop diaper, you simply hold the diaper over the toilet and spray the poop off. To make this less messy, we also have a homemade "spray shield", made from two cheap trash cans and a heavy duty chip clip. I cut off the bottom of one of the trash cans, so the water drains right into the toilet. I simply clip the diaper to the tip of the can and spray! Once I'm done, I rinse the shield and put it into the trash can with the bottom on it, so if it drips, it won't drip onto the floor. (THANK YOU PINTEREST!) You can also purchase a diaper sprayer, but these run anywhere between $25 and $50 and work just as well as the cheap DIY alternative. 


Handling Messy Diapers

Changing diapers is really not a big deal at all. Yes, it is a little extra work, but not much and totally worth it. Pee diapers are simple - once they're off, peel the liner off, take the insert out of the pocket, if you're using one and throw them all into the wet bag. Poop diapers can be a little messy and this is a huge reason why a lot of people prefer to use disposables. Once I've wiped Samantha and thrown the wipes away (we still use the diaper genie for disposable wipes) I fold the diaper in half and set it aside until baby is re-diapered and back to playing or in a secure spot. I personally like to rinse them and deal with them right away, because it's easiest, quickest and frankly a lot less stinky that way. I rinse the liner first and the diaper second, after taking out the insert. Once I have the chunks rinsed off (sorry - I warned about the TMI!), I will sometimes put them in the sink to wash out further with one of those nail brushes that we got at the hospital. I wear rubber gloves, wring them out when I'm through and put them in the wet bag, then wipe the inside of the sink with a Clorox wipe. That's it! Once the poop is more solid, I'll simply be able to dump or spray it into the toilet and be done with it, without having to take that extra step. A lot of people don't anyway, but I prefer to, because it means less smell to deal with when I wash diapers and it keeps them from staining as badly.


Washing Diapers

Figuring out a wash routine for cloth diapers is kind of like conducting a science experiment at first. Due to the waterproof PUL (Polyurethane Laminate) material that the outermost part of diapers are made of, the elastic in the legs and waist and the fact that you want to make sure your diapers or inserts remain absorbent for as long as possible, there are lots of do's and don'ts. I went on a website called fluffloveuniversity.com, which helped me come up with a wash routine based on our washer and pick a cloth-friendly detergent, based on our personal preference. Since we have very hard water, I have to use liquid water softener when I wash diapers, because it prevents buildup that can affect the diaper's absorbency. It's recommended to not use stain removing sprays such as Shout, fabric softener or dryer sheets, as these can also cause buildup.
I wash diapers every three days, which is usually when the wet bag is completely full. I take the whole bag and dump it into the washing machine, turn the bag inside out and add it. That way, I'm not having to touch the diapers themselves. When you do a load of cloth diapers, you wash twice. For the pre-wash, I use a cap full of Calgon and a small amount Gain liquid detergent (to line 1 or 2) and select speed wash with warm/cold water. Once it's done, I add the kids' dirty clothes to the washing machine for the main wash, with another full cap of Calgon and a full cap of Gain detergent and select Cotton/Towels with hot/cold water. I put all of the liners, inserts and our AIOs in the dryer (the AIOs don't air dry very well) and hang the pockets and covers to dry, which keeps the elastic in them from wearing out. 


Some folks like to "strip" their diapers every once in a while, for instance by using bleach, baking soda and an enzyme cleaner (there are a million ways to strip them, depending on what you're most comfortable using), but if you've got a good wash routine in place, this is usually not necessary. We've been cloth diapering for about 4.5 months now and when the diapers come out of the wash, they smell and feel like new! 


The Cost Breakdown

Cloth diapering can be very inexpensive if you shop around for the best prices, buy on sale or purchased "pre-loved" cloth diapers. Estimates I've seen have shown that the average cloth diapering cost for one child for the time he or she is in diapers is anywhere between $500 and $800. The average disposable diapering cost for one child over a 3 year period in off-brand diapers is anywhere between $1500 and $2000. Name brands and eco friendly diapers can cost up to $4800.

ALL of the cloth diapering necessities that we've purchased since we started totaled out to $348. Those include: 14 pocket diapers, 6 AIO diapers, 1 AI2, 9 diaper covers, 5 diaper prefolds, 5 snappis, 15 bamboo inserts, 17 microfiber inserts, 1 roll of 100 disposable diaper liners, a blanket's worth of homemade fleece diaper liners, 2 wet bags, a diaper sprayer, two trash cans and a clip for the spray shield and a drying rack with clips. 

Now you're probably asking yourself "But how much does it cost to launder cloth diapers on top of the initial cost?!" The answer is much less than you think. While there are loads of different types of cloth diaper specific detergents, you don't HAVE to use it. Most people use regular detergent such as Tide and Gain, which are a LOT cheaper. And if you coupon, you can get either for next to nothing! Our detergent and water softener, which we only have to purchase once every 2-3 months are right around $10. I checked out a blog post of a fellow cloth diapering mom and she spent the time she cloth diapered comparing her utility bills to the months she didn't cloth diaper and found that the difference was an average of $2. In total, between the utility increase and the detergent, the cost of her cloth diaper laundry for 1 year was $58.58.( You can check out her post here: http://themonarchmommy.com/2016/06/07/real-cost-cloth-diaper-laundry/ )

So let's say, that was also our cost for a year's worth of cloth diaper laundry. Multiply that by 3 (let's be realistic - I doubt Samantha will be fully potty trained by age 2!) and add that to our cost of $348 for all of our supplies. That totals out to $523.74. In comparison, 3 years worth of Sam's Club diapers would be approximately $1,752. So cloth diapering is less than a 3rd of the cost of disposables!


Our Cloth Diaper Setup & Storage

Our new bathroom is MUCH bigger than our previous ones, so we're fortunate to have room for the changing table in it! This makes it SO easy to take care of poopy diapers, since I can rinse them right there. 


Well, that's about it! As I said before, we've been cloth diapering for about 4.5 months and while we've had to experiment a lot with different inserts, types of diapers and figure out exactly how long Samantha could go between changes, it's been going extremely well! I wish so much that we had cloth diapered Vincent, but we simply did not have the money to invest in them when he was a newborn. Yes, it is extra work, but it is totally worth it!! It saves us a lot of money in the long run, the prints are super cute and they're a lot more environmentally friendly as well. I hope you enjoyed learning a little bit more about modern cloth diapering today! If you have any questions or comments, please feel free to drop a comment below! :)

Thursday, January 12, 2017

L’Oréal EverPure Moisture VoxBox Review


I have been using these products exclusively for a couple of weeks now, to experience the lasting affect they have and I've been very pleased! Since I haven't dyed my hair in a while, I wasn't able to test how well this particular shampoo keeps color, but it most definitely helps moisturize. 


The first thing I noticed with this shampoo, is that it doesn't foam quite the same way my other shampoos have. So for the first couple washes, I used more shampoo than I really needed and was a bit turned off by that, because I figured if it wasn't foaming well, I wasn't using enough! But it turns out, that's just due to the lack of sulfate in the shampoo, so I started using less and my hair has gotten just as clean! I generally go a few days between shampooing my hair, because it becomes extremely dry and brittle otherwise. In those days between shampooing, I didn't notice my hair start to get greasy any earlier than with the other brands of shampoo I use.

The elixir is AMAZING. Though I am not a major fan of this particular scent, it leaves my hair incredibly soft and smooth! 


I think the thing I liked the most about these products, is that they are sulfate free. Which means that they doesn't strip your hair and skin of it's natural oils quite as much as a shampoo with sulfate would and therefore won't dry it out as badly. These are also fantastic products for folks who are allergic to sulfates. I was happy to be able to recommend these to my stepmother in law, who is allergic!

Disclaimer: I received these products complimentary from Influenster for testing and reviewing purposes. All opinions are my own.

Vick's EasyFill Cool Mist Humidifier Review


Back in November, I received this complimentary Vick's EasyFill Cool Mist Humidifier VoxBox from Influenster. And oh my goodness, it couldn't have arrived at a better time! It's winter, so naturally, we've been having some crud going around for a bit. Coughs, runny noses, congestion, head colds, sinus problems et cetera. On top of that, New Mexico extremely dry, particularly in the winter when you've got the heater running! I've had so many problems with dry skin and lips and a sore throat in the mornings, which a humidifier definitely helps with.


I purchased our first cool mist humidifier per Samantha's pediatrician's recommendation, when she was having some congestion problems as a newborn. Walmart's selection was pretty limited at that point and I needed something cheap that would get us by. It did was it was supposed to do, but wasn't fantastic.

This Vick's humidifier has been nothing but amazing. Here are the features that I've loved the most:

1. It holds 1/4 of a gallon more than our old humidifier did (1.25 gallon tank capacity) and runs up to 36 hours.
2. It is insanely easy to refill! Because of it's slim design and shape, I am able to remove it, set it upright in our sink and let it fill up. With our old one, I had to hold it at a super awkward angle to get it to fill and I wouldn't be able to fill it all the way unless I used a pitcher or a cup. I also couldn't set it down in the sink to fill it, due to its funky shape.
3. There is the option of adding 1-2 VapoPads, which provide soothing menthol vapors. We used the one the humidifier came with one night and it worked wonders for my stuffed up nose!
4. The knob allows you to control the mist output, as opposed to two output settings like our old humidifier had. It also shuts itself off automatically once the tank is empty and has a small light to indicate that it's turned on.
5. It is QUIET. Seriously - without the little light shining, you can hardly even tell it's running! Our old one was pretty noisy.
6. This humidifier has no filter, whereas our old one did and needed to be replaced every so often.
7. You can change the direction of which way the mist blows without having to reposition the humidifier, simply by lifting the piece and rotating it. (Pictured below)
8. This is totally unimportant and minor, but I LOVE the sleek and modern design! Our old one looks like something out of the 80s, whereas this one is quite a bit more pleasing to the eye up on top of the dresser! xD


I'll add that since we've been using the humidifier every night, our congestion and coughs have drastically improved! Samantha went from having what we thought was a cold of some sort to absolutely no issues within about a few nights of using this consistently. I've turned it off for a couple of nights here and there to test the difference and it's extremely noticeable! I'm not sure how we slept without this thing before we got it.

The only two complaints I have (which honestly aren't even really complaints) are: 1. I preferred the way the mist sort of blew out of our old humidifier like a vent. This one has the mist coming out of the top, so I feel like you're not getting quite as direct of a hit with the humidity. 2. I could honestly do without the light on the knob to adjust the humidity. While it is useful, I tend to be bothered by lights like that in the bedroom at night. I solved it by simply turning the humidifier in the other direction, so it's not too bright.

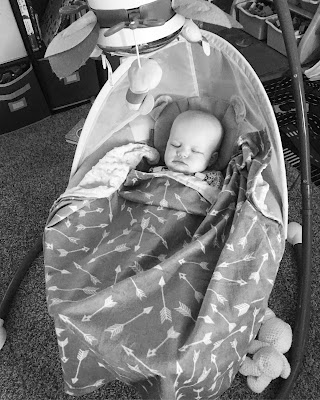
All in all, I am extremely pleased with this humidifier and highly recommend it!! :D Here's a photo of a happy baby after the congestion finally went away:


If you're interested in testing this humidifier out for yourself, you can find it on Amazon by following this link:


Disclaimer: I received this product complimentary from Influenster for testing and reviewing purposes.